This is the 9th part of my Road to CE series, in this post we’ll look at iOS and fully managing iOS (iPhone/iPads), we’ll cover MacOS briefly as well for the initial setup, but MacOS will be a future post.
Sadly Apple MDM in Intune isn’t as fluid as Android, but we’ll go through it.
Initial Setup
First you need an Apple Business Manager (Intro to Apple Business Manager – Apple Support (UK)), ABM is used to auto enrol Apple Devices into Intune, and if a device is reset it stays within your control.
Apple Business Manger
While new devices (reseller permitting) will automatically go into ABM, existing devices to show in ABM require the device to be reset. Even when you reset the device it’s not the end of the registration an up to date iOS device close to the existing device.
Sign up for an ABM/AEM. Once that’s configured you’ll want to sync users into ABM/AEM. When you start doing this you’ll be claiming your domain, any existing users using that email domain will be asked to change the email, I recommend instructing users to change to the onmicrosoft.com email instead, but you have different opinion.
Follow the guide at Sync users from Azure AD into Apple Business Manager – Apple Support (UK) to setup the Sync between AAD and ABM, this uses SCIM to pull users into ABM.
Next I’d recommend setting up Azure AD Federation in ABM, follow the guide at Use federated authentication with MS Azure AD in Apple Business Manager – Apple Support (UK) to complete this. This will allow your users to sign into Apple ID using your organization credentials.
ABM and Intune
Finally we need to setup the MDM link from ABM into Intune. Follow the instructions on Tutorial – Use Apple Business Manager to enroll iOS/iPadOS devices in Intune – Microsoft Intune | Microsoft Learn to setup this link.
Enrolment
As we recommend using ABM you will be using the Enrolment program tokens
Intune > Devices > iOS > Enrolment > Enrolment program tokens
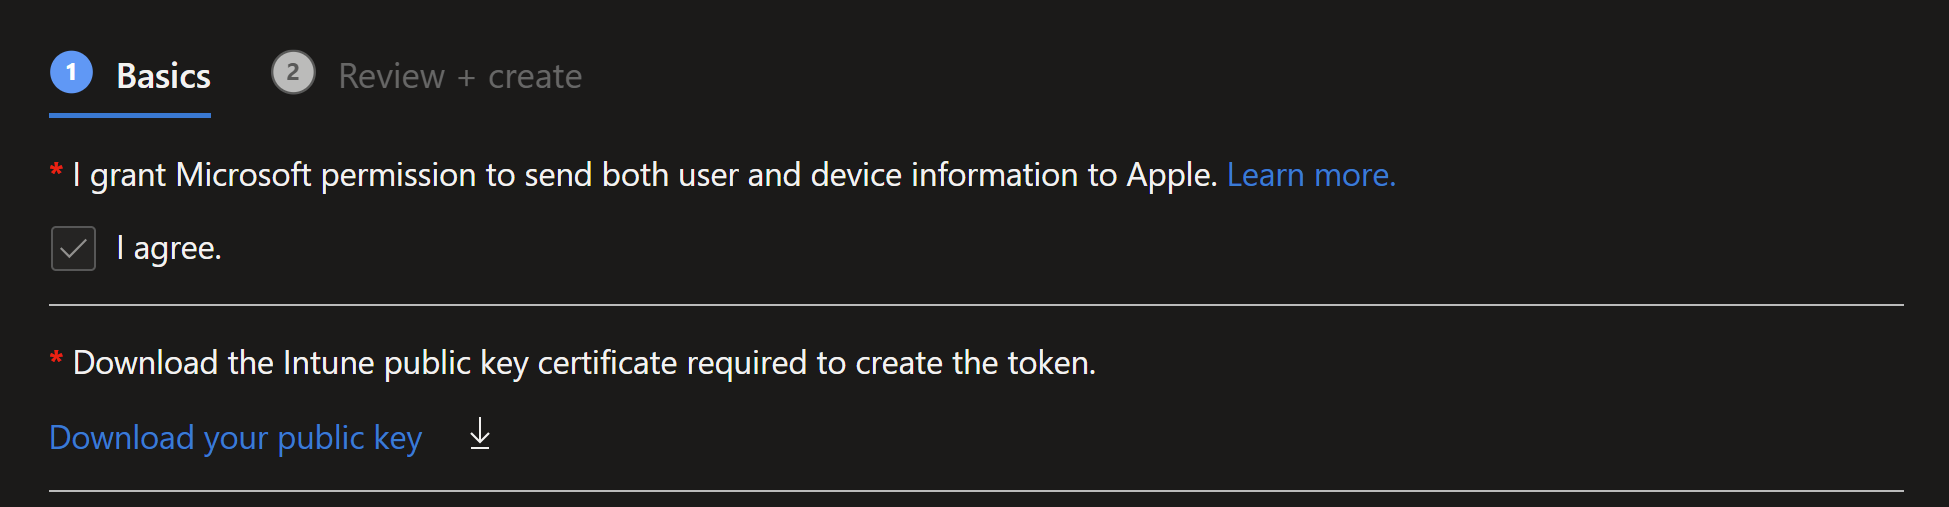
Add a token program, this will give you a pem (public certificate) to upload to ABM.
 Follow the instructions linked for ABM/School Manager to configure ABM/ASM
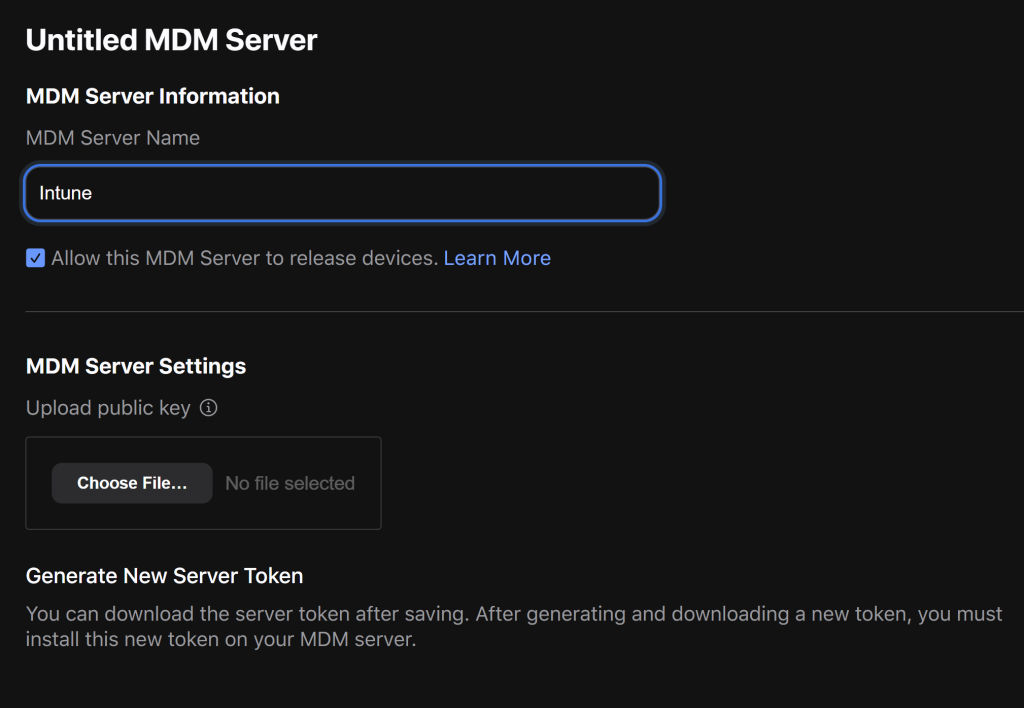 Download the server token and re-upload this to Intune. You will need to enter the apple id you used, make sure you can change this if needed.
That will create the link to ABM for device enrolment syncing.
Any devices you buy, make sure the supplier can enrol them into your ABM using your customer number in ABM. If you need to manually enrol devices, this is a pain, you need an iOS device (iPad/iPhone) with the Apple Configurator installed on. Follow Apple’s guide at Apple Configurator User Guide – Apple Support (UK) for instructions on using the Apple Configurator.
⚠️ Warning you will need to reset devices to manually enrol them ⚠️
Once the device is in ABM you will need to manually assign it to your Intune MDM server and trigger a sync.
To manually sync: Intune > Devices > iOS > Enrolment Program Tokens > %your program name% > Devices > Sync.
Wait for the sync to finish and the device to show up in the list with the sync button on it. If you don’t that device won’t be properly sync’d into Intune!
Enrolment Profile
The Enrolment profile is where you can set the naming scheme you want to use and disable some of the steps on the setup screen (similar to Autopilot for Windows).
User Affinity & Authentication Method: User affinity
Enroll with User Affinity: Select where users must authenticate
Setup Assistant
Install Company Portal: Yes
Install Company Portal with VPP: Don’t use VPPManagement Options:
Supervised: Yes
Locked enrollment: Yes
Shared iPad: No
Sync with computers: Deny All
Await final configuration: Yes
Device Name:
Apply device name template (supervised only): Yes
Device Name Template: IPAD{{SERIAL}}
Cellular data plan:
Activate cellular data: No
Setup Assistant:
(This is where you can turn off setup assistant options: e.g.)
Apple Pay: Hide
Siri: Hide
Diagnostics Data: Hide
Enrolment Profile Group/Filter
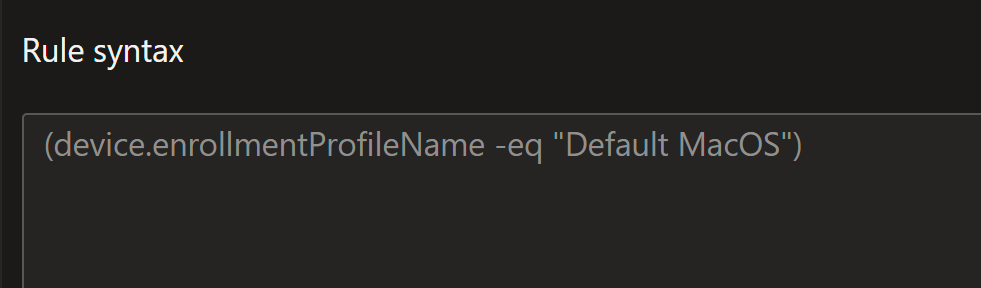
Once the profile is setup I would recommend creating a dynamic device group using that profile name, as well as a tenant filter. You use the enrollmentProfileName.
For available apps shown in Company Portal you need to assign to a user group, the filter can then come in to ensure the app is only shown on ABM devices.
Because you are fully managing the Apple Device and Apple ID you will need to pull apps through from ABM.
Apps
To procure apps, to go ABM, under Apps and Books acquire the apps you want users to have access to. You will then need to sync those apps into Intune.
Follow the guide at Manage Apple volume-purchased apps – Microsoft Intune | Microsoft Learn to sync them.
Intune > Tenant Admin > Connectors and Tokens > Apple VPP Token > Scroll to the right of the table > … > Sync
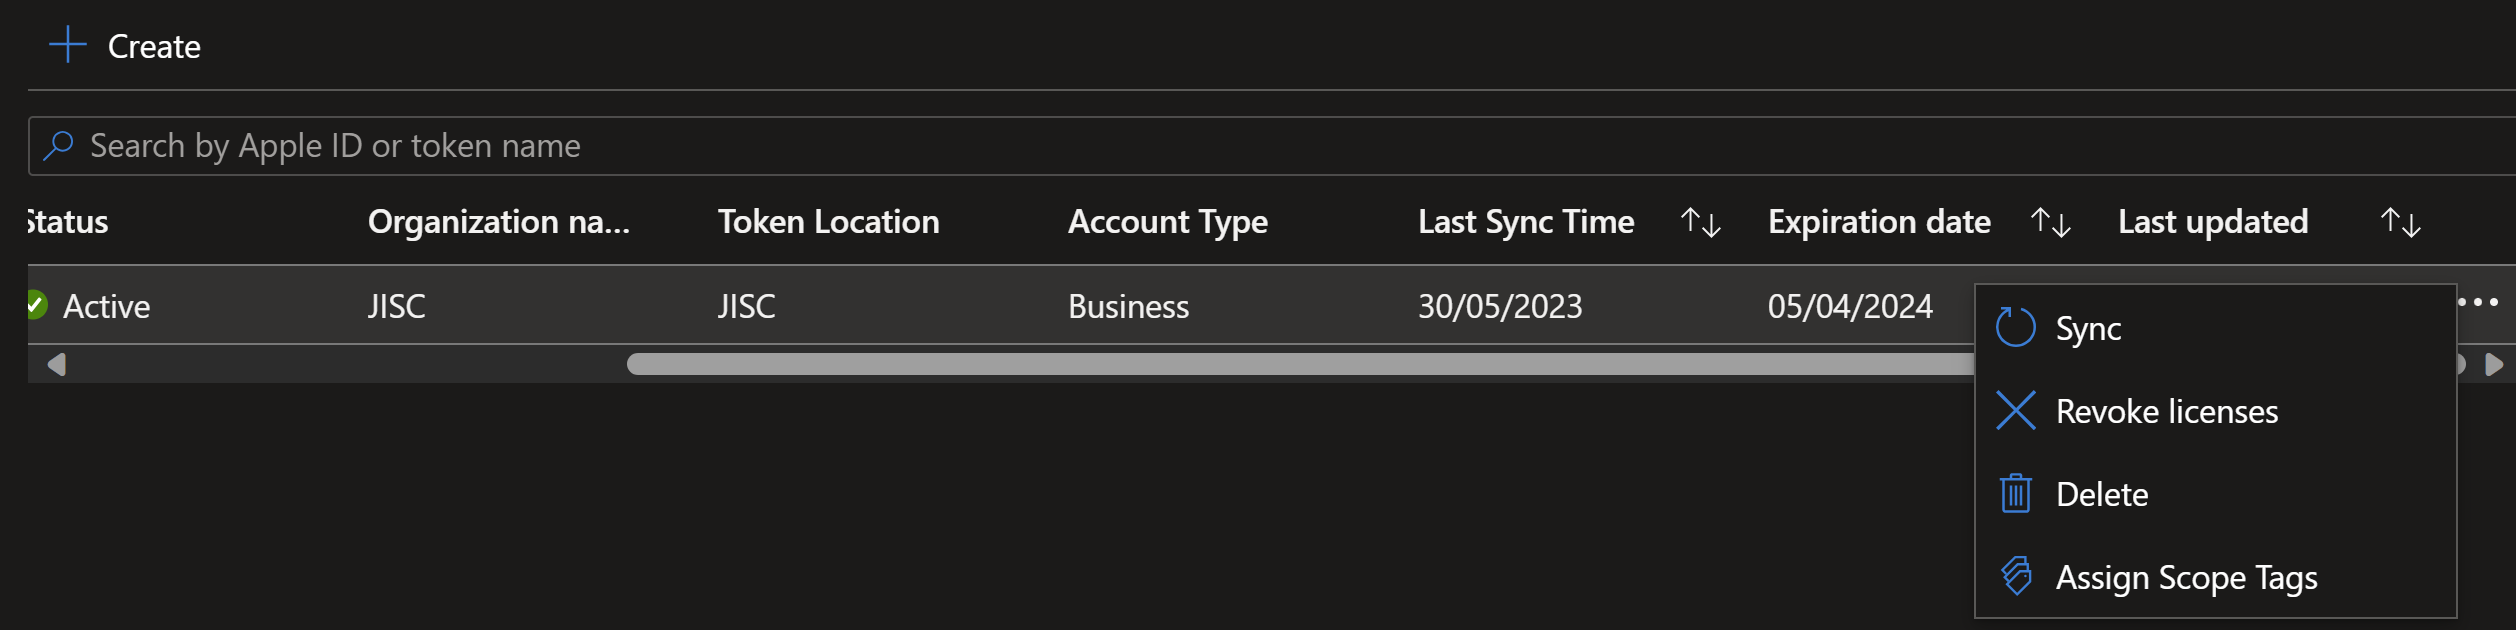
Once the apps have sync’d, which can take 5 minutes, you can then assign them via the Apps > iOS/MacOS menu.
For all Apple VPP apps you will need to assign the apps to user groups to make them optional. Required apps can be assigned to devices.
IntuneMAMUPN
A little gotcha from Microsoft here, you will need to create some App Configuration profiles to deploy the IntuneMAMUPN to supported applications, this then means MAM will detect those assigned devices as Managed.
You can find more information about this at Manage transferring data between iOS apps – Microsoft Intune | Microsoft Learn
- In the Microsoft Intune admin center, create and assign an app protection policy for iOS/iPadOS. (Add > Managed devices)
- Using the naming scheme (iOS %appname% IntuneMAMUPN) is my preference
- Select the platform (iOS)
- Select the App (e.g. Microsoft Outlook)
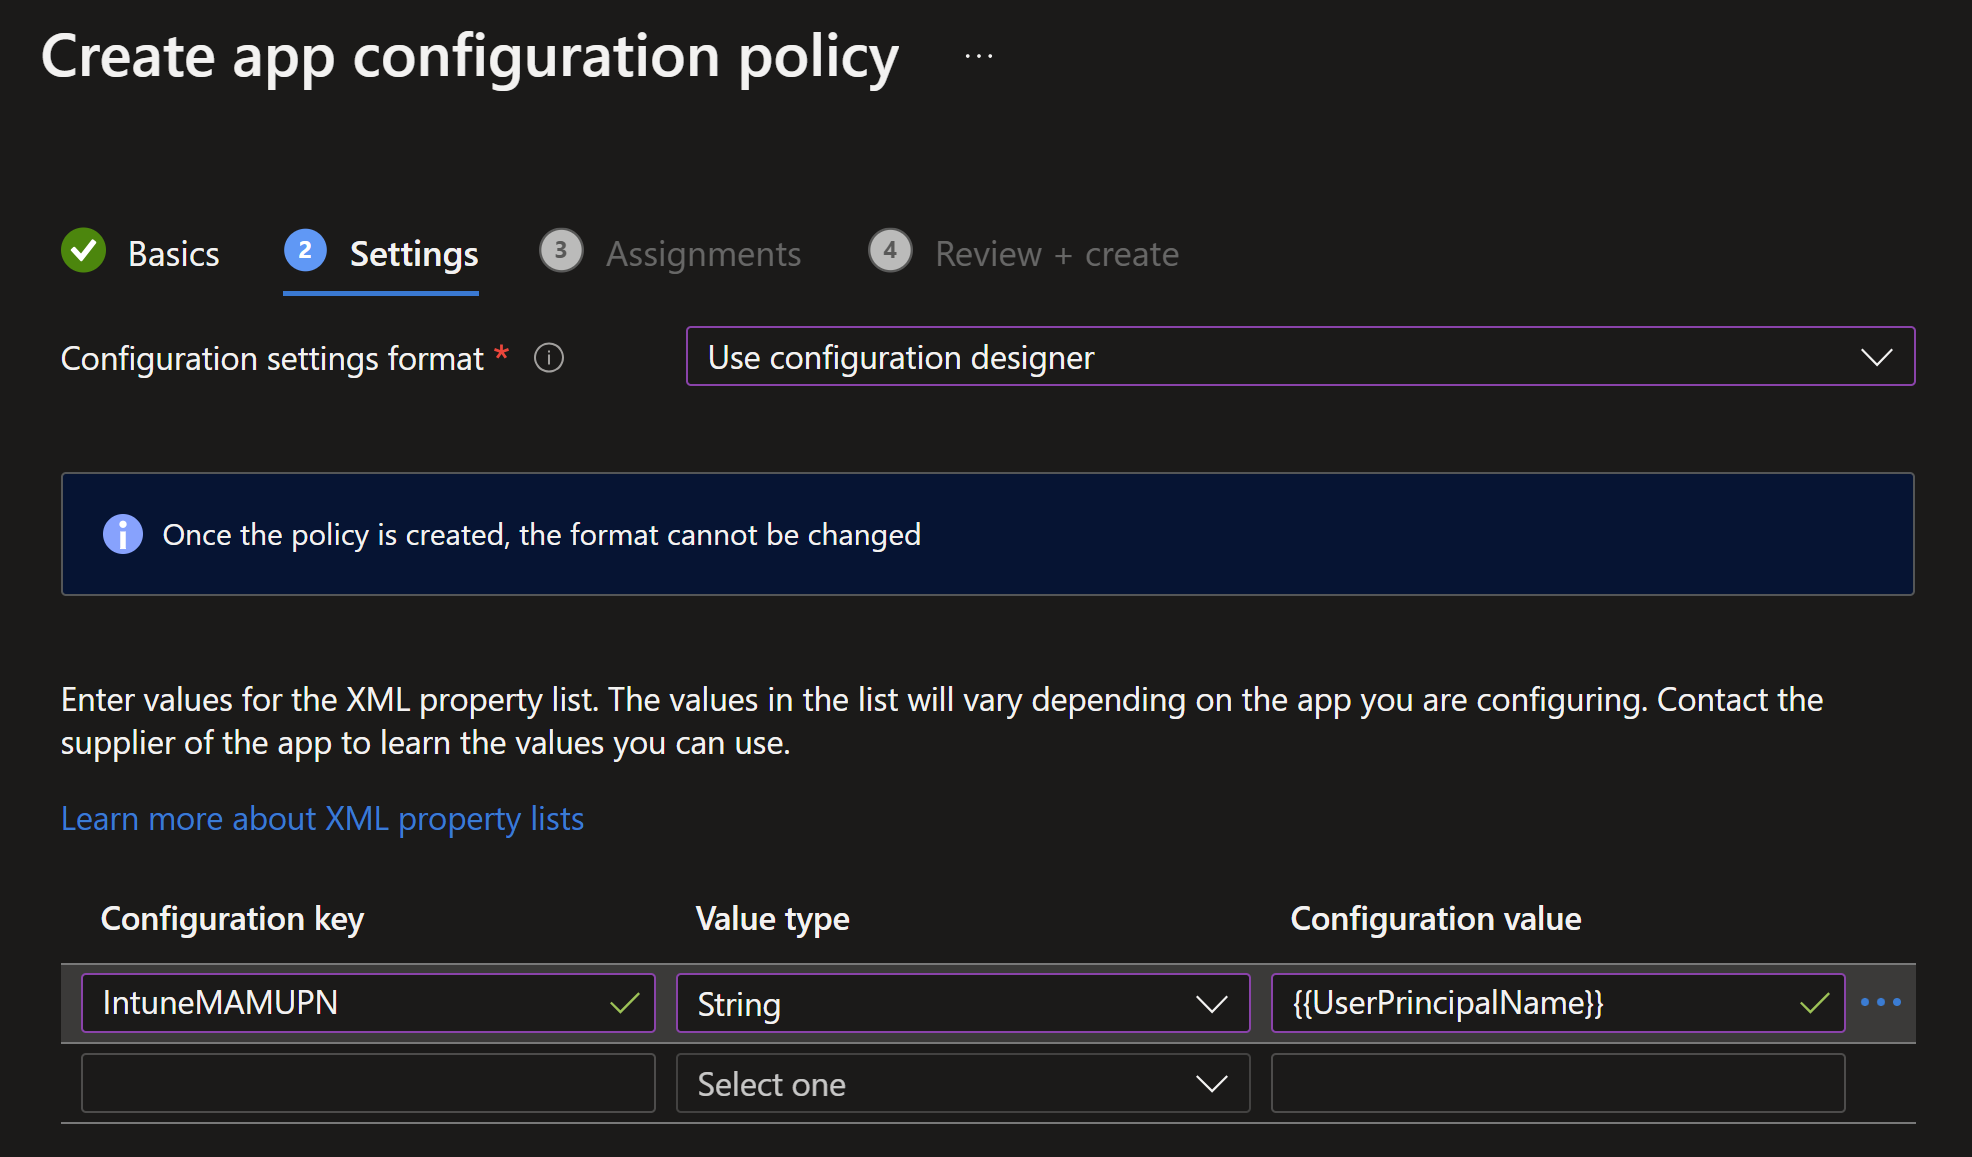
- Deploy the app with the following app configuration settings to the managed device:
key = IntuneMAMUPN, value = {{UserPrincipalName}}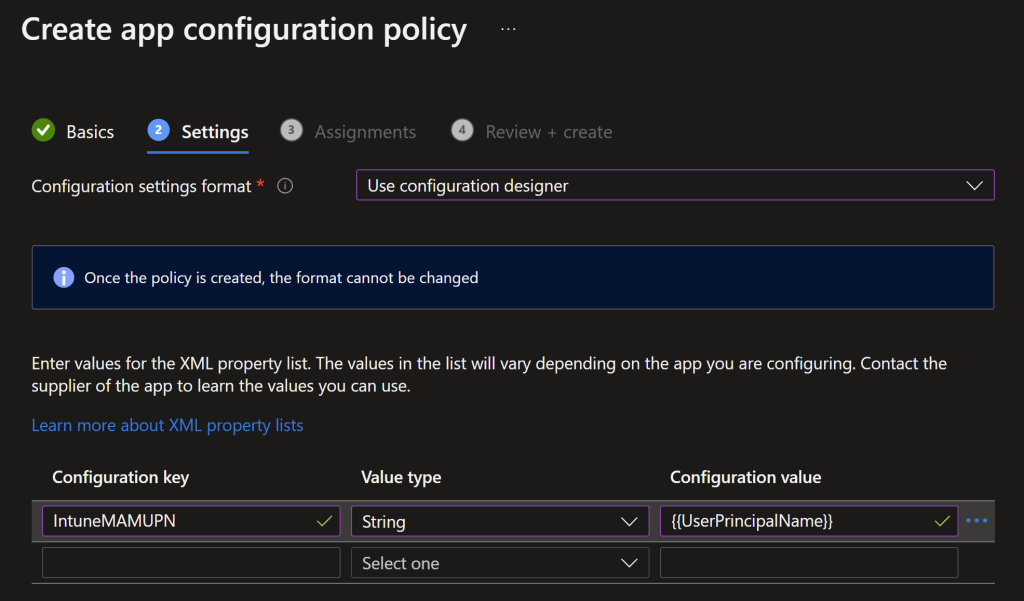
Screenshot of setting IntuneMAMUPN
Compliance Policy
As with Windows/MacOS you will want to use compliance policy to enforce when a device is longer able to access company data. If you have access to the Jisc CE/M365 Tool you can enter Cyber Essentials in this policy for it to be auto updated.
Device Health
Jailbroken devices: Block
Require the device to be at or under the Device Threat Level: Secured
Device Properties
Minimum OS version: 16.5 (at the time of writing)
Microsoft Defender for Endpoint:
Require the device to be at or under the machine risk score: Clear
System Security
Require a password to unlock mobile devices: Require
Simple passwords: Block
Minimum password length: 6
Required password type: Numeric
Number of previous passwords to prevent reuse: 2
Actions for noncompliance
Use the actions for non compliance to remove access to company data to non compliant devices, and also notify them that their device is in such a state. Under CE you can give them 14 days to install the update/fix compliance issue.
Mark device noncompliant: 1 days
Send push notification to end user: Immediately
Add device to retire list: 14 days
Remotely lock the noncompliant device: 5 days
Send email to end user: 1 days
Send push notification to end user: 3 days
Update Policy
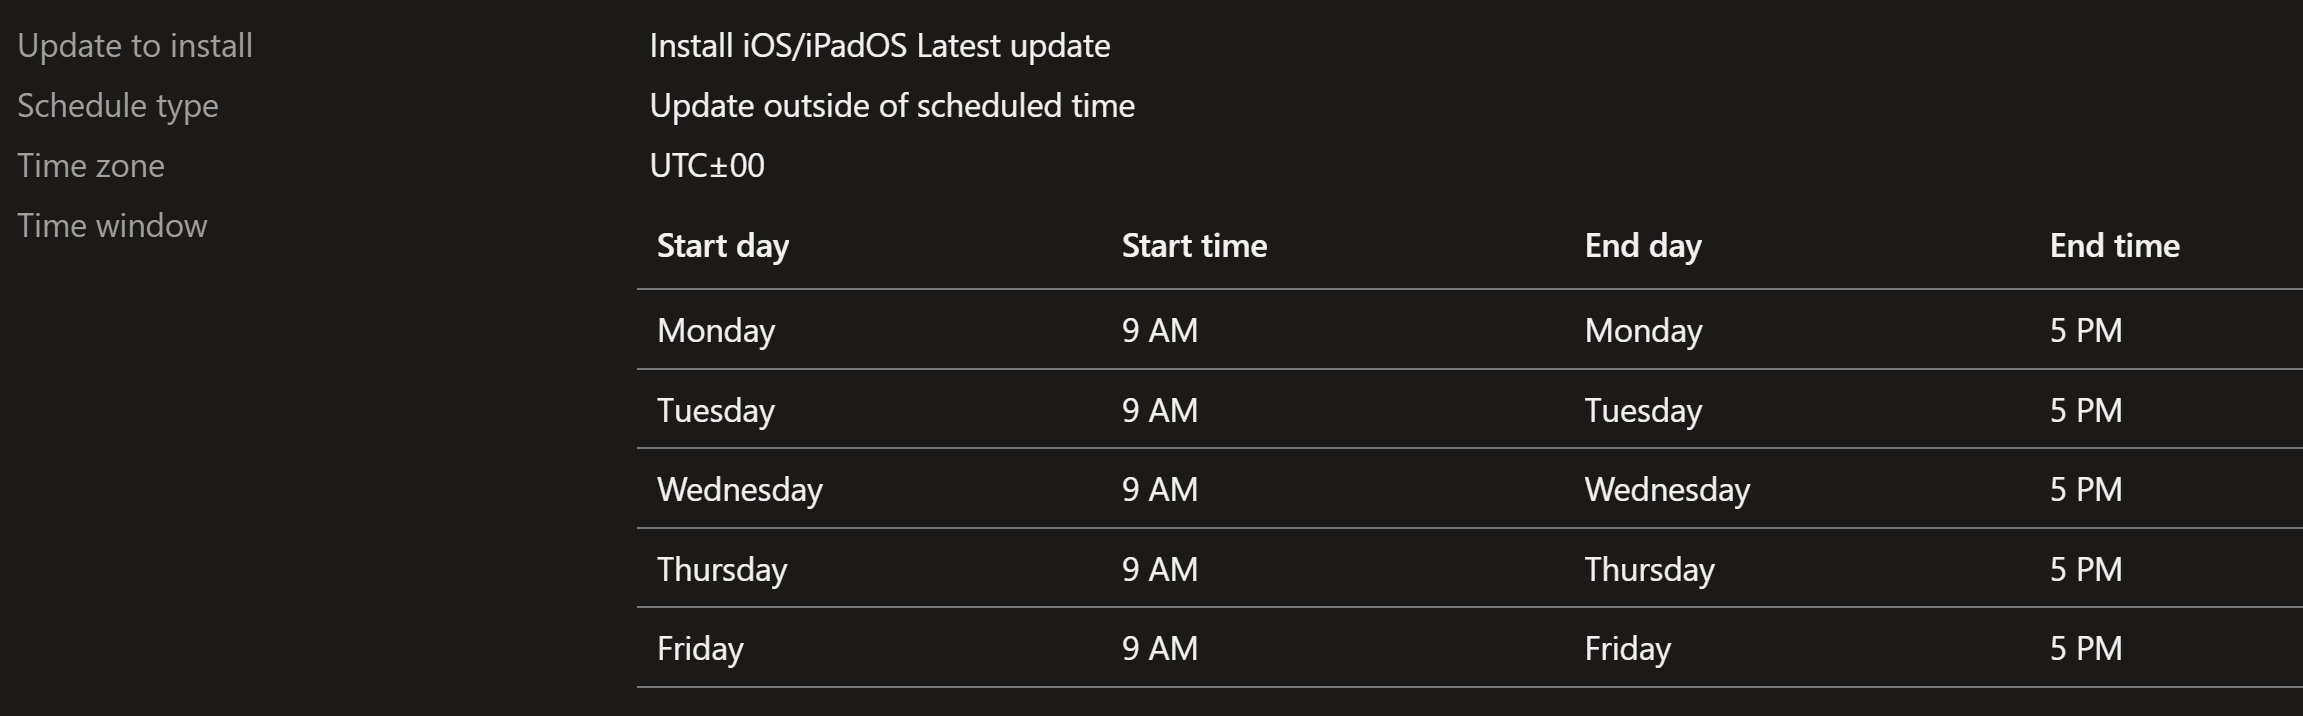
Depending on if you want to verify updates, this policy covers assuming the update is ok.
Update to install: Install iOS/iPadOS Latest update
Schedule type: Update outside of scheduled time
Time zone: UTC±00
Time window: Monday – Friday / 9am – 5pm
Configuration Profile
Using Intune’s settings catalog you can config iOS to be more secure and monitor compliance.
Restrictions
Here you can remove the consumer functions of iOS (recommended) and enforce app updates
Safari Force Fraud Warning: True
Allow Untrusted TLS Prompt: False
Allow Enterprise App Trust: True
Allow Apple Personalized Advertising: False
Allow NFC: True
Allow Chat: False
Allow Lock Screen Notifications View: False
Allow Open From Unmanaged To Managed: True
Allow Open From Managed To Unmanaged: True
Allow Enterprise Book Metadata Sync: False
Require Managed Pasteboard: True
Allow Passbook While Locked: False
Allow Account Modification: False
Allow Managed Apps Cloud Sync: False
Allow Fingerprint For Unlock: True
Allow Diagnostic Submission: False
Allow Assistant While Locked: False
Allow Podcasts: True
Allow Air Print: True (Optional if your print solutions supports air print)
Allow Global Background Fetch When Roaming: True
Allow Diagnostic Submission Modification: Disabled
Allow Proximity Setup To New Device: False
Allow Password Proximity Requests: False
Allow Mail Privacy Protection: True
Allow Automatic App Downloads: True
Allow Unmanaged To Read Managed Contacts: False
Force Air Print Trusted TLS Requirement: True
Force Limit Ad Tracking: True
Allow Password Sharing: False
Allow App Installation: False
Allow Bookstore: False
Allow Assistant: False
Allow System App Removal: True
Allow ESIM Modification: True
Allow Game Center: False
Allow Auto Unlock: False
Allow App Removal: False
Force Classroom Automatically Join Classes: False (You may want this enabled if you Classroom functionality)
Allow Files Network Drive Access: False
Allow Erase Content And Settings: False
Force Assistant Profanity Filter: True
Allow Air Print iBeacon Discovery: False
Allow Safari: False
Allow iTunes: False (Consumer iTunes)
Allow UI Configuration Profile Installation: True
Allow USB Restricted Mode: True (power mode basically)
Allow UI App Installation: True
Allow Keyboard Shortcuts: True
Allow Cloud Private Relay: False (Users shouldn’t be storing/using iCloud really)
Allow Cloud Photo Library: False
Allow Cloud Document Sync: False
Allow VPN Creation: False
Allow Paired Watch: False
Allow Cloud Backup: False (again making sure you control the data)
Force Air Play Outgoing Requests Pairing Password: True
Allow Device Name Modification: False (the name comes from the ABM profile)
Allow Continuous Path Keyboard: True
Force Authentication Before Auto Fill: True
Allow Voice Dialing: True
Allow Shared Stream: False
Allow Music Service: True
Allow Find My Device: True
Allow News: True
Allow App Cellular Data Modification: False
Allow Air Print Credentials Storage: False
Allow Lock Screen Today View: False
Allow Files USB Drive Access: False (disable USB access, use OneDrive for syncing)
Force Automatic Date And Time: True
Allow Enterprise Book Backup: False
Allow Enabling Restrictions: True
Allow In App Purchases: False
Allow App Clips: False
Allow Notifications Modification: False
Allow Find My Friends Modification: False
Allow Find My Friends: False
Allow Air Drop: False (DLP)
Allow Managed To Write Unmanaged Contacts: False
Allow Wallpaper Modification: True
Allow Bluetooth Modification: True
Allow Unpaired External Boot To Recovery: False
Allow Assistant User Generated Content: False
Force Encrypted Backup: True
Allow Explicit Content: False
Allow Dictation: True
Force Air Drop Unmanaged: True
Allow Password Auto Fill: False
Allow Definition Lookup: True
Allow Bookstore Erotica: False
Allow Remote Screen Observation: False
Allow Fingerprint Modification: True
Allow Cellular Plan Modification: False
Allow Video Conferencing: False
Allow Multiplayer Gaming: False
Allow Cloud Keychain Sync: False
Allow Photo Stream: False
Allow Host Pairing: False
Security
Configure the passcode to meet CE
Max Grace Period: 0
Min Length: 8
Force PIN: True
Min Complex Characters: 0
PIN History: 24
Max Failed Attempts: 11
Allow Simple Passcode: False
Require Alphanumeric Passcode: False (optional to say yes)
Closing
In closing with iOS management in Intune you can get a very secure setup in very little time. The biggest hurdle is getting ABM/ASM setup.
For help and support reach out to your Jisc Relationship Manager, or cloud@jisc.ac.uk.
More to come in the Road to CE series.